background

Thursday, November 15, 2018

Recent Swaps, Coloring Classes, etc.

Howdy!

Hope everyone is doing well and staying warm. It is a snowy day here in Frederick MD. I love a good snow day, but it's a little early this year?! I have been super busy creating, taking coloring classes and participating in swaps. I thought I would share a few of my creations and projects I am working on. 

First, I have had the honor of participating in several ATC swaps and I wanted to share a few. 

I participated in a metallic ATC Coin swap with 7 Kids College Fund and here was my contribution: 


I also participated in a POP ATC Coin swap with https://www.thefrolickingfairy.com/ and Kindred Stamps:


I also created this cute card for a large card swap with friends. The theme was "get well". Love this stamp from Create A Smile


Finally, I started taking coloring classes with Kit and Clowder and here is my first class. It is a pencil class and I am excited to take others. 


Thanks for stopping in! 
:) Pam
geezypeaseypapercrafting.blogspot.com
@geezypeaseypapercrafting

Monday, October 22, 2018

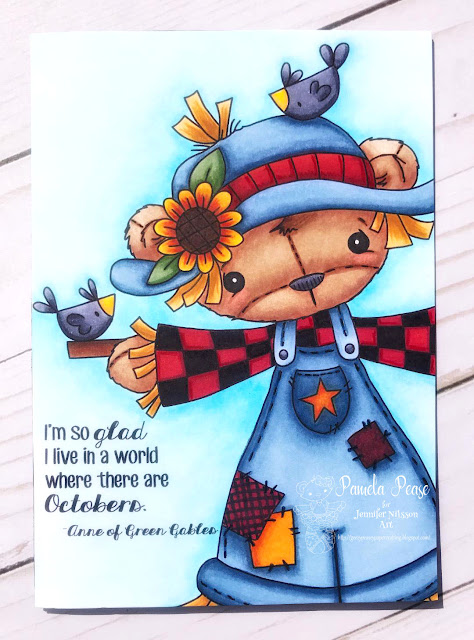
First post for Jennifer Nilsson Art - Scarecrow Teddy Card

Hello, my crafty peeps!

So happy to be back on a Design Team. I highly encourage you to check out this amazingly talented artists designs. Just a click away here.

So for my first project, I choose the Scarecrow Teddy design. How adorable is this image? I have to say it was so fun to color! The fun part of working with digital images is your ability to customize them to your liking. I decided I wanted the image to be the main focal point of my card so I was able to enlarge it to fit as a card front for a 5x7 card. The other awesome part of digital images is you can include any saying you wish. I have a special love for the series Anne of Green Gables so I choose one of Anne's sayings for the front. I was able to choose my own fonts too!

I colored my image with Copic markers and just added a few details with my Prismacolor pencils. A tip for those new to the world of digital images...the printer you use isn't as important as the paper. Make sure you are using a paper that will handle the coloring medium you choose. For example, I knew I was going to be coloring with Copic markers so I used a Copic friendly paper to print (Neenah). I also let my image rest for about 20 min before I started to color. Just to be sure that the ink was good and dry.


If you haven't tried digital images I really do suggest Jennifer Nilssons designs. They are formatted perfect and very user-friendly. If you have any questions I would be happy to answer them. Just message me and I'll get back to you ASAP.

Also, we have an exclusive Facebook group just for Jennifer Nilsson Art fans. You definitely want to join us for inspiration, exclusive deals and free images only shared on the Facebook group. Click HERE to join us.

Happy crafting!

Pam Pease
DT member for Jennifer Nilsson Art

Monday, October 15, 2018

New Design Team!!

Hello my crafty peeps!

I know its been a while, but I am excited to announce that I have joined a new Design Team. Jennifer Nilsson is a very talented artist and I can't wait for you to see her amazing designs. I will be sharing my first project Monday, October 22. In the meantime, if you would like to check out her work please visit www.jenniferlnilssonart.etsy.com.  Stay tuned....


Wednesday, August 29, 2018

When you are in a pinch try Paperless Post!

This is a sponsored post written on behalf of Paperless Post. All opinions are 100% mine.

We all have those moments of "temporarily" forgetting a special event. Well, what do you do when it's your friends birthday and you know that sending a traditional card through the mail will take too long? Rendering it late, and then turning it from a Happy Birthday! to a Belated Happy Birthday! Well, how about an online service that will send a stylish, thoughtful, fun, personalized card right to that persons inbox immediately!? I KNOW!! SAVED! Another cool feature is you can even schedule them for later dates. How about never missing a persons birthday again? You can schedule as many as you like for as far out as you like. SCORE!

Now let me preface this by saying everyone and anyone who knows me knows I am an avid crafter and specifically a card maker. That being said, we all have those times in life when we just get crazy busy, etc. For instance, I am typing this today using one hand, My other hand, typing hand, is wrapped up in an ace bandage. I am having MAJOR crafting withdrawal, but it's just impossible for me to create my usual handmade card. Thank goodness for a company like Paperless Post I was able to send my beautiful friend Pam (AKA Sissy to me, because we are more like sisters), a hostess card right away. If I were to have waited until I was well enough to dive back into my craft room, she would have been waiting too long for a proper thank you. Below I will detail the very simple process of making a digital card using Paperless Posts service.

You can play around on the site and see what you can create. Anything from party invites, all occasion cards, and in my case, a hostess thank you card, and a get well card.

Your first step is to purchase coins. These coins are what you use to pay for the service.
Once you have the coins in your account you can begin creating. I will take you through my process for the hostess card I picked out.

First, I am I love the fact that I could pick the design of the card, paper, typeface, color, and even the inside envelope pattern.  It was a lot of fun and took no time at all. I worked on the draft and was able to save it to finalize later.

So I picked out this pretty pineapple pattern card and matching envelope liner. I love how bright and cheery it was. I decided on a yellow salutation and the note in green. I picked out the fonts, etc. There really is a bunch of customization you can do.

 
←Final Front of the card


I was able to see that she received and viewed the message. Through the app, I was also able to see a response message from her thanking me. So cute, Thank you for the thank you! :)

Below is an example of a get well card and I discovered I used Paperless Posts service in 2015 for my daughters' bday invites. I completely forgot but it was saved in my account!


←Great example of how you can set up an invite to receive responses. You can see who has viewed it and their responses. You can even add it to your calendar.


If you would like to check out this awesome and convenient service, check it out here. Also, don't forget about the handy mobile App.

Crafty hugs,
Pam Pease

Saturday, July 7, 2018

Four cards using SSS July 2018 Stamp Kit

Hi there,

So I have been very lucky to spend the last two weeks in Myrtle Beach with my folks. I started my first monthly card kit with Simon Says Stamp this month. Luckily, I was able to have it shipped to my parents. I have had lots of time to play with it this week. I absolutely love having a coordinating kit to work with. Makes life so much easier. Especially since I have very limited supplies here. So far I have created four A2 cards. With many more in the works.

All supplies will be listed at the bottom of this post :)


Be a flamingo in a flock of pigeons card:

The kit came with a flamingo die cut that perfectly matches the stamp. My first card uses this along with the adorable flamingo saying, coordinating glitter card stock, patterned paper, and blank white card base. All which came in the kit. To get the "flamingo" saying pink, I used post-it notes to mask off the rest of the sentiment. stamped it in pink, then masked off the rest and stamped in black. I used my prismacolor pencils to color the flamingos. All black/white and one pink. Which I pop dotted off the card for dimension.


You bring the sunshine card:

I used my watercolors to color in the suns in different shades of yellow. I used a clear sparkle marker for added fun. The sequins was also part of the SSS July 2018 Card Kit. 


You're one cool pineapple card:

I colored the cool pineapple with my copic markers. Then I randomly stamped the sunglasses and cute sentiment. I also die cut the banner from a Pink and Main nesting set and used the sequins and patterned paper from the SSS kit. 


Fishing you a happy birthday card:

I used distress inks for the background and spritz water to help give the illusion of water. I stamped this adorable fish and colored it in using my Copics. The patterned paper was included in the SSS kit. 


Supplies Used:

SSS- Simon Says Stamp July 2018 Stamp Kit Signo, White Gel PenJet Black Amalgam Ink PadThin Fish Tail Banner Dies - Pink and Main, Zig Wink of Stella Clear Copic Markers, Prismacolor Pencils, Double sided adhesive

Crafty Hugs,
Pam Pease
geezypeaseypapercrafting.blogspot.com
https://www.instagram.com/geezypeaseypapercrafting/


Wednesday, June 27, 2018

Stay Strong card for Pink and Main Stamps

Hello!

I have had the great pleasure of being on Pink and Mains Design Team since the very beginning. It's been 4 years of wonderful friendships, collaborations, and artistry. I have truly enjoyed every minute working with Michelle and all the fab ladies here. Today is my last post with this amazing Design Team. However, I will be a lifelong customer and fan. I can't wait to see all the amazing things to come in the future. Who knows, you might just see me pop by with the some projects occasionally. Now on to the fun stuff...creating! As always, a list of the products used will be at the bottom along with links. :)

My card this week is featuring the new viking stamp set Norse Day. I am out of town visiting my folks. So I was a bit limited on supplies. However, I was excited to do a simpler card using minimal products. It was refreshing and I feel like the stamps are truly the main focus. To pump this card up a bit more, I thought it would be cool to put a yellow glow around the background of the viking and his ship. But again, I embraced the simplicity this time.

My Process
First I started out stamping and coloring the viking and ship using Copic markers on Neenah Solar White 110lb card stock. I also used the same card stock as my A2 base. I cut the waves from the same paper and had fun playing with different blue Copic combinations to enhance the waves. I simply layered them and tucked the images behind the first wave. I stamped the inspirational saying using black ink and voila! A simple, clean, and fun card


Pink and Main Supplies Used
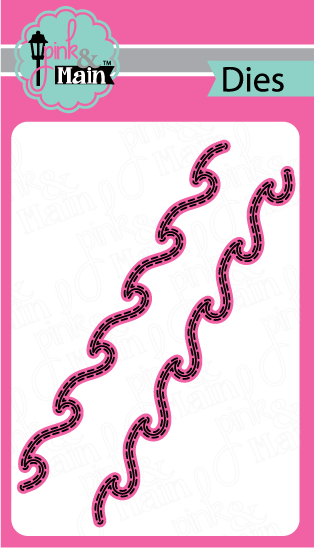
Wave Border DiesNorse Day Stamp SetNorse Day Dies
Other Supplies Used
Neenah Classic Crest 110lbVersafine Black Ink PadTonic Liquid Glue,
If you haven't checked out the newest release from Pink and Main you can go here.

Crafty hugs,
Pam Pease

Wednesday, June 20, 2018

Sunshine Cards for Pink and Main

Hi!

My design team project this week is using some new amazing stamps and dies from Pink and Mains June release. This combo has a special meaning to me. When I met my husband, many moons ago, I use to sing "You are my Sunshine" to him. Yes I know it's disgusting :P! When I saw the script "Sunshine" with sentiments, and the awesome sunshine die cut panel, Sunny Cover, I knew I had to make my hubby a card with it. I really enjoyed these. As always, a list of the products used will be at the bottom along with links. :)

My Process

You are the Sunshine of my Life card:
I created a standard top folding A2 card using 110lb black card stock. I first die cut the Sunshine panel die, Sunny Cover, from heavy duty Bazzill card. I temporarily adhered it to a non stick mat completely in tack. I then got out my trusty Oxide Inks and colored the front panel until it was blended throughout. I did leave off the bottom panel, which I decided to edge in orange, but leave white for the "Sunshine" die to pop. After the Oxide inks, I sprayed it with a sparkle paint (no sun here in MD today so you don't see the sparkle as much). After it dried, I popped all the rays, and sun. Cut out the Sunshine word and colored it with an ombre effect using the same oxide inks. I finished it off a few glossy dots.

You Are My Sunshine Card:
I created a standard side folding A2 card using 110lb black card stock. I die cut the Sunshine panel die, Sunny Cover, from several P&M yellow patterned papers. A trick is to put the die cut over the card and trace where the rays go. This will help you line up the rays.  I used the die cut "Sunshine" from the other card and layered a piece of black paper behind it. Super easy and a great way to utilize the die cuts.


Image 1


Image 1

Image 1


Pink and Main Supplies Used
Sunny Cover DiesSunshine DiesMy SunshineBirthday Girl Glossy Dots

Other Supplies Used
110lb Black Card Stock, Oxide Ink, Wild Honey Oxide Ink, Fossilized Amber, Oxide Ink, Frayed Burlap,  Versafine Black Ink PadTonic Liquid Glue

If you haven't checked out the newest release from Pink and Main you can go here.

Crafty hugs,
Pam Pease

Monday, June 4, 2018

Turtley Amazing Card for Pink and Main Stamps

Hello Peeps,
How about a sneak peek! So excited to share some of the new releases that will be available next week from Pink and Main Stamps. First, I am in love with this adorable turtle set called Turtley Amazing. They have some amazing wave dies coming in the new release too! Stay tuned!

My Process
I wanted to really showcase those new beautiful wave dies, so I created a 5x7 card this time. I started by using distress ink sprays and a shimmer sparkle spray on the background. After that dried, I die cut the waves out of the background and a navy blue piece of cardstock. I layered the waves, leaving space so I could tuck some characters in. I finished it off with our silver glossy dots as ""bubbles" and heat embossed the adorable sentiment. The images are colored using Prismacolor colored pencils on Neenah white cardstock.


Check out Pink and Main stamps here.

Crafty hugs,
Pam Pease

Friday, May 25, 2018

Pink and Main Collaboration with ClearSnap!


We hope you enjoy the inspiration found on the team blogs from Pink and Main and Clear Snap.

I did two cards showcasing products from both of these amazing companies. All of my supplies used will hyperlinked throughout. 

The first is a fairly simple, but a fun card. I first created an A2 card using Neenah Solar White cardstock. I colored the Pink and Main stamps, My Tribe, using Copic Markers. Then I die cut out the girl and feathers using the coordinating My Tribe Dies. Added a subtle strip of orange patterned paper from the Be Brave 6x6 Paper Pad. For the background I sprayed  Colorbox Spritzers in Mermaid and Grasshooper, then blotted with a paper towel. I love the subtle texture this gave the background. I also used liquid glue and sprinkled some fine glitter, Twinkle Dust by Donna Salazar. I really liked this glitter. Even though it was very fine, it was super easy to clean up and didn't cling to everything. And who doesn't love the cute shaker bottle! 


The second card I created using the new Large Fish Tail Banner Dies on Desert Storm Neenah Cardstock. I folded the cardstock in half, leaving the very top edge off the die plate so the banner die would cut into a card. I used the adorable Pink and Main Stamp set, BBQ. The piggie and grill were colored using Copic markers. The background was created using Smooch Spritz in Copper. These pictures do not do this justice. It looks so cool in the light and I thought it really went well with the BBQ theme. The black and white patterned paper is from the Spring Color Pop 6x6 Paper Pad. Finally, the sentiment, which matches this card perfect, was white heat embossed. 


There are prizes available for this hop! Pink and main will be giving a $25 gift code to their website, and Clear Snap will be giving away a prize pack valued at $25. All you have to do to win a prize is hop along the blogs and follow and leave comments on their posts. We will choose 2 random winners from the comments posted. We will post the winners on June 1st.
Here is the lineup for the hop… enjoy!


Pink and Main

Crystal

Kate

Tonya

Pam


Pamela (YOU ARE HERE)

Mitsyana (GO HERE NEXT)


Thanks for hoping with us!

Crafty hugs,
Pam Pease

Wednesday, May 23, 2018

Vertical Thinking of You Card for Pink and Main

Stopping in to share my latest Design Team card for Pink and Main. I used some cute summer stamps and some of the newest releases. As always, a list of the products used will be at the bottom along with links. :)

My Process
I created a standard A2 card using Bazzill white cardstock. I colored the images with my copics. The frames are the new Cloudy Frames Dies released this month. For those, I diecut 4 of the medium frames and stacked them together for dimension. I popped the kiddos so they would look like they were peeking through the frames. The background was created using a ColorBox Spritzers Dye Ink Spray called Mermaid. The sentiment is from the new Vertical Greetings set and was embossed in black ink and powder.


Pink and Main Supplies Used
Vertical GreetingsSending WavesSending Waves DiesCloudy Frames DiesBirthday Girl Glossy Dots

Other Supplies Used
Bazzill white cardstock (base), Gina K Designs JET BLACK AMALGAM Cube Ink Mini Pad, Versafine Black Ink Pad, WOW! Embossing powder in Black, Colorbox Spritzers in Mermaid, Nuvo Liquid Glue
If you haven't checked out the newest release from Pink and Main you can go here. It is simply amazing!

Crafty hugs,
Pam Pease